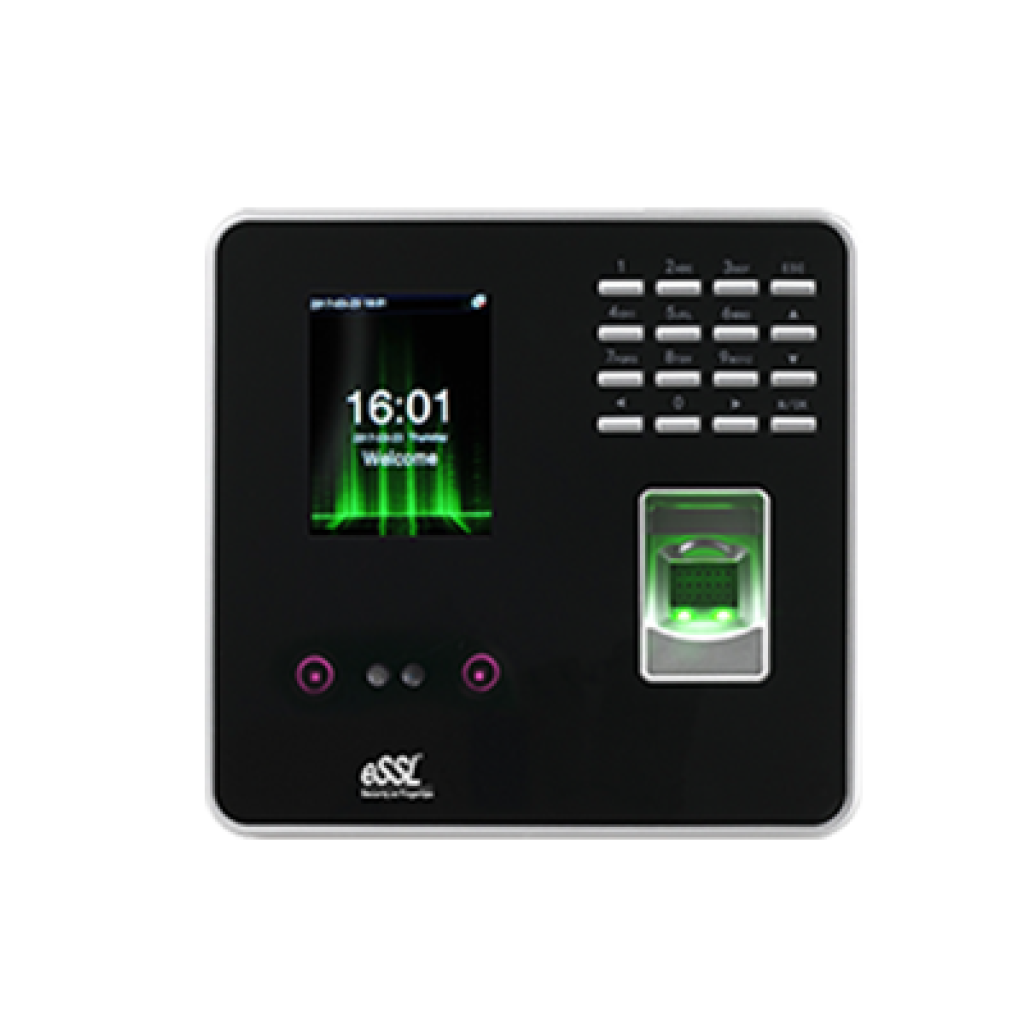
mb20

Face - MB20

Price - Rs. 9000

Category - Face

Features -

User Capacity : 1000 ,
Fingerprint Capacity : 2000 ,
Face Capacity : 500,
Transaction Capacity : 50000.

Note : "We strongly recommend contacting your vendor to request a firmware update that includes the auto-block feature."

Specifications

Storage Capacity

  • User Capacity : 1000
  • Fingerprint Capacity : 2000
  • Face Capacity : 500
  • Transaction Capacity : 50000

Visual/Audio

  • Display : 2.8" Color LCD
  • Sound : Stereo Speaker

Communication

  • Communication : TCP/IP, USB-Host
  • Push Data : Yes (≤1 Sec)

Standard Function

  • Automatic Status Switch, Self-Service Query, DST, T9 Input, 9Digit User ID,Scheduled Bell, Photo ID, Lock, Sensor, Exit Button

Power & Environment

  • Power Supply : DC 5V --- 0.8A
  • Operating Temperature : 0°C - 45°C
  • Operating Humidity : 20% - 80%
  • Dimension (in mm) : (L)161.93 x (W)152.82 x (H)30.59

Features

  • Fingerprint, face, RFID and password 4 type verification mode
  • High-speed identification less than 1 second
  • TCP/IP Port for Internet connection
  • Access Port available to control one lock and exit button
  • Optional 5V 1900mAH UPS, standby up to 3 hours
 

4-in-1 Feature Combo

All essential tools combined for a seamless experience
Price: Rs. 11,400(Rs.1,000 courier charges will be extra)
mb20

Face MB 20

Rs.9000
essl-magnet-em-lock-for-door-lock-access-method-biometric-1000x1000

EM Lock

Rs.1600
EML600-7-LZ-1-300x300-removebg-preview

L/U Bracket

Rs.450
essl-Push-9-SQ-600x576-removebg-preview

Exit Switch

Rs.350

How to Setup ESSL Biometric

Follow these Steps for Configuration

Step 1 : Change Server Address

Location: *Main Menu >> Comm. >> Cloud Server Settings*
Enable Domain Address: True (ON)
Server Address: essl.ndgms.com:86
Enable Proxy Server: False (OFF)
HTTPS: False *(OFF)
Note: Please Share Photo of the screen when settings done.*

Step 2 : Check DHCP Setting

Location: Main Menu >> Comm. >> Ethernet/Wireless Network
DHCP: *True (ON)
Note: Please Share Photo of the screen when settings done.*

Step 3 : Share Device/Cloud ID

Location: Main Menu >> System Info/About >> Device Info >> Device ID
Note: Please Share Photo of the screen.*

Setup Tutorial

Watch Video Tutorial Here